Archive | Pinterest Challenge RSS feed for this section

Spring Pinterest Polka Dots

8 May

pinterest spring

If you’re unfamiliar with the seasonal Pinterest Challenges (first of all, where have you been?!), it’s a challenge to get pinterest users to stop pinning ‘someday’ projects and start DOING.  All you have to do is take inspiration from pinterest and put your own spin on a project.  This season’s gracious hosts are Sherry @ Young House Love , Katie @ Bower Power Blog, Emily @ Sparkle Meets Pop, and Renee @ RedBirdBlue.  I can’t wait to see what projects they tackle!

My previous season’s Pinterest Challenge projects include sketch chair art, a DIY juju, and a coffee table bench to name a few (check them all out here).

I know I posted a pseudo-pinterest challenge on Monday,

elis one

but I’m an overachiever apparently and couldn’t resist doing another project.

I’ve been loving pretty much any DIY project I see lately with gold polka dots:  Chelsea from Lovely indeed has tackled a gold polka dot photo backdrop, a gold polka dot table runner, and a suede and (you guessed it) gold polka dot mouse pad.  Cassie from Hi Sugarplum went to town on this gold dot vase.  So, I’m jumping on the bandwagon admittedly.

About a month ago, I pinned these pillows from Anthropologie

polka dot anthro pillows

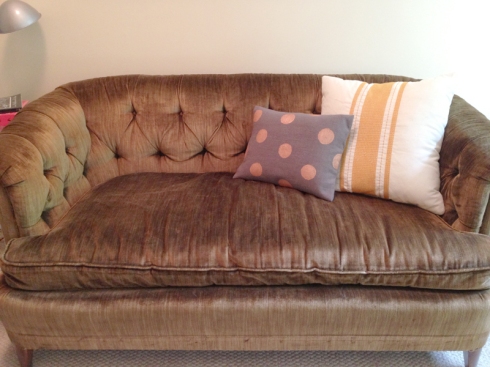
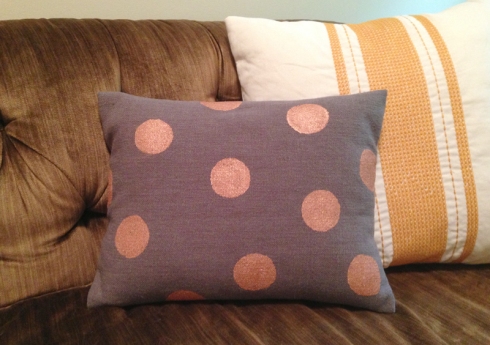
When this season’s challenge came along, it didn’t take me long to decide on this.  And I did it in under an hour, so SCORE!

diy pillow settee

(Please excuse the picture quality- I forgot my good camera at Clark again so I had to rely on my iphone camera and I am not perfected in the science of iphoneography… side note to self for future iphone pics: zooming makes it grainy, zoom AFTER you take the shot.  Now back to our regularly scheduled programing.)

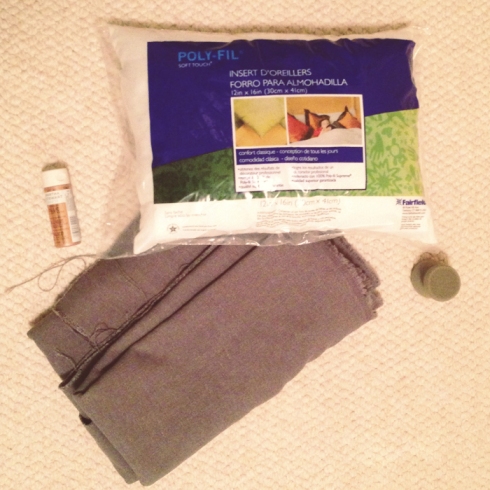
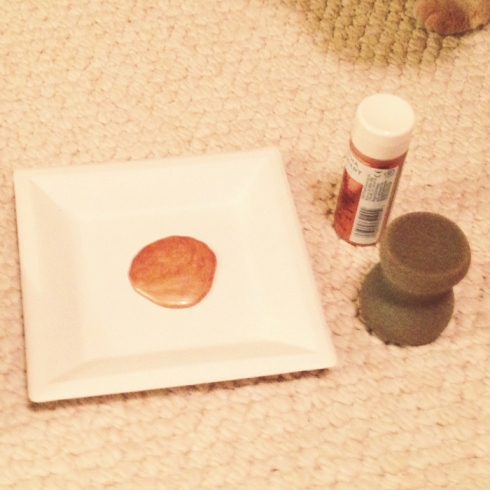
I already had the gray fabric, a pillow form and sponge, so all I needed to buy was a few dollars worth of copper paint.  I said it, Copper, not Gold.  Gasp! I thought the rosy quality of the copper would compliment the gray best.

diy pillow supplies

I chose to make an envelope style pillow because they’re easy to make and easy to take off the pillow and wash.

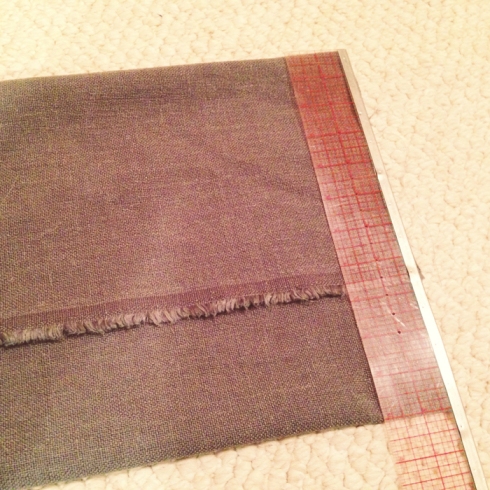
First step is to cut your fabric- this will wrap the pillow with seams only on the 2 sides.  Make sure you allow for overlap for the ‘envelope’ part (I allowed 3 inches since I was using a small pillow form)

diy pillow cut to size

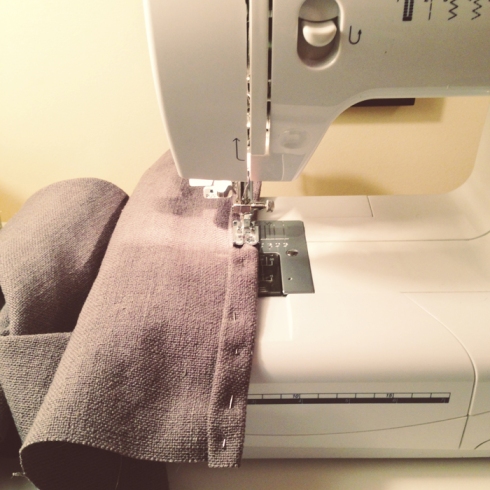
Next, fold over one of the shorter sides about 1/4 to 1/2 inch, then fold it over again.  Pin and sew- this will be exposed at your ‘envelope’ opening.

DIY pillow hem edge

Once that is sewn, fold your fabric into your pillow shape.  Make sure the ‘bad side’ of the fabric is out and the finished edge you just created in folded inside so that everything’s corrent when you turn it all right side out.  I’m not a fan whatsoever of karate chopped pillows– I like them overstuffed, so I made my pillow cover 1 inch smaller than my pillow in each direction.

DIY pillow measure size

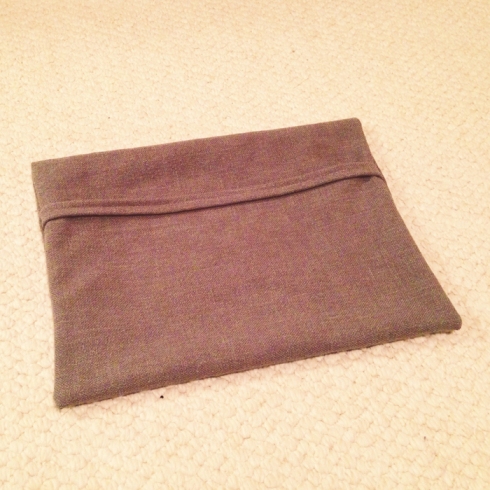
Once you sew up the 2 sides, you can turn the pillow cover right side out.

DIY pillow flipped

Now it’s time for the fun part!!

DIY pillow paint

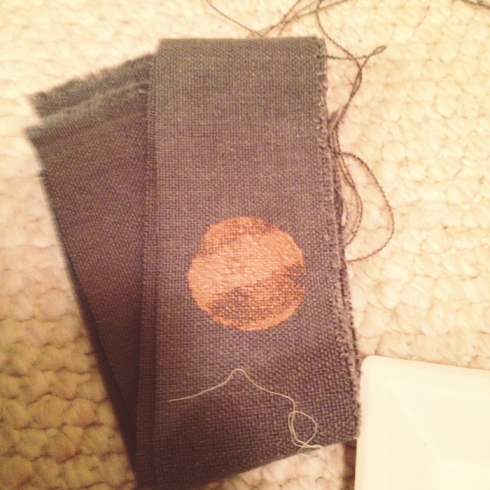
I did a few polka dot trials on a scrap piece to figure out my technique before I started on my pillow.

DIY pillow dot trial

I put the pillow into the cover still in its plastic so that I could paint my dots without worrying about the paint bleeding through to the pillow or the back of the fabric.

DIY pillow dots

I let it dry overnight before I took the plastic-covered pillow form out of the cover and re-inserted it sans plastic.

I’m swooning over the copper/gray combo and the scale of the dots!  Yes, I’m swooning over a pillow and yes, I know I have issues.  I embrace them.

DIY pillow

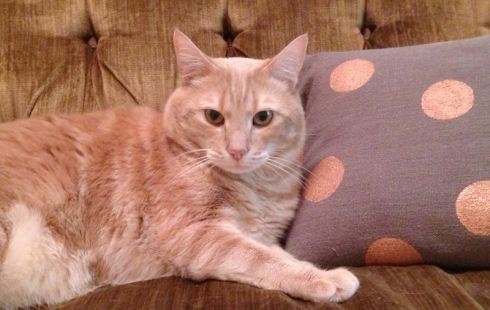
Bear approves.

DIY pillow bear

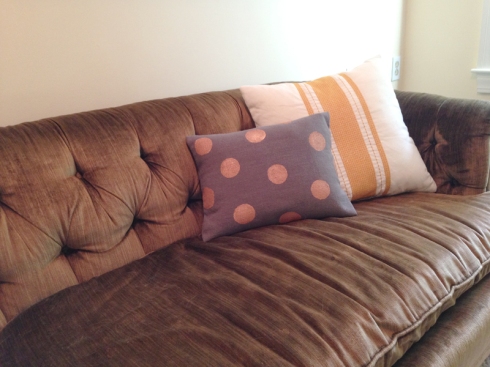
Are you loving it as much as I am??

diy pillow angle pic

I’d love to see you’re projects!  Link them up in the comments, or just say HI!

Sugar High

6 May

Clark’s MLS listing is LIVE!!!  That means I have only a few days to scramble and finish everything on my To Do list before the open house Saturday!  Friday I’ll be sharing the complete reveal- are you as excited as I am?  You should be!

I’m definitely looking forward to a mini-‘vacation’ as we look for our next flip, though.  I gave myself this whole weekend off and I’m not sure my body knew what to do with itself.  Maybe after this week I’ll finally get to my neglected projects around here (I’m talking to you sexy secretary desk).

I was originally planning to save this for my Pinterest Challenge post on Wednesday, but why wait?  I might even to a second project for the pinterest challenge then too.  We’ll see.

Anyway…

Guess who turned ONE on Cinco de Mayo!

Eli birthday

Yup, Cutest Nephew Ever, Eli, celebrated his first birthday this weekend.  And Auntie Karen was tasked with the cake(s).

I may not cook, but I do bake every blue moon.  The last fancy cake I made was for my friend’s baby shower 2.5 year ago, so I guess it was about time.

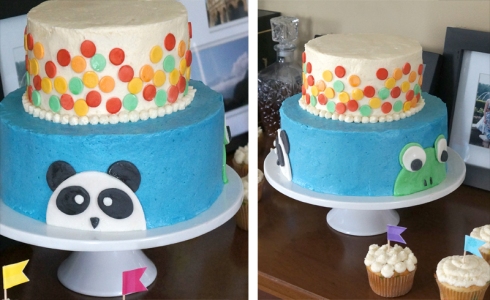
The main cake was inspired by animal prints that I made for his nursery last year, modeled after ones I saw on Etsy.  (decorations are gumpaste and the frosting is this recipe.  There was also a penguin face on the other side that I didn’t get a pic of)  I really like how this cake came out

elis cake

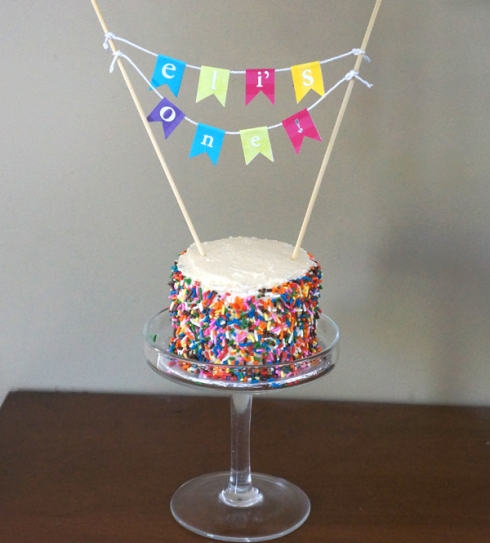
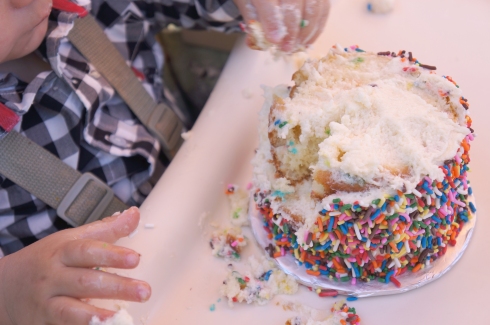
but Eli’s smash cake just makes me smile

elis one

Smartie pants figured out what to do with it pretty quickly and required a wardrobe change after the mess he made (the way it should be!)

eli cake

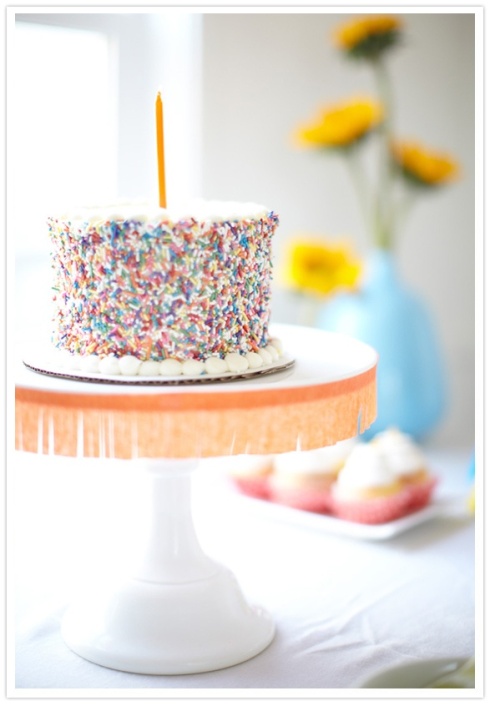
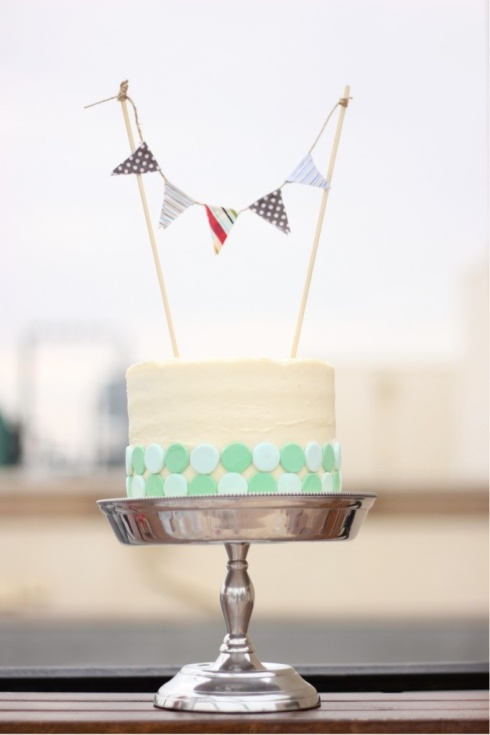
Pinterest was a GREAT inspiration for these cakes because I was kind of figuring out the designs as I went along.  These pins were my top inspirations for his little cake:

I’m very pleased to say that all of the huge cake and Eli’s cake were gone by the end of the party- I even saw people going back for seconds!

Oh, and if you need a great stress reliever, throwing handfuls of sprinkles at a mini cake is definitely a good time.  Just sayin…

Are you planning on participating in the Pinterest Challenge this season?  I’d love to see your projects! Link them up in the Comments section!

Winter Pinterest Challenge: Chair Sketch Art

27 Feb

I am now the proud owner of a Floor Nailer!

In other news, it’s Wednesday!  Do you know what that means??

It’s Pinterest Challenge Day!!

pinterest-challenge-banner

If you’re new to this blog, check out my previous challenge projects here.

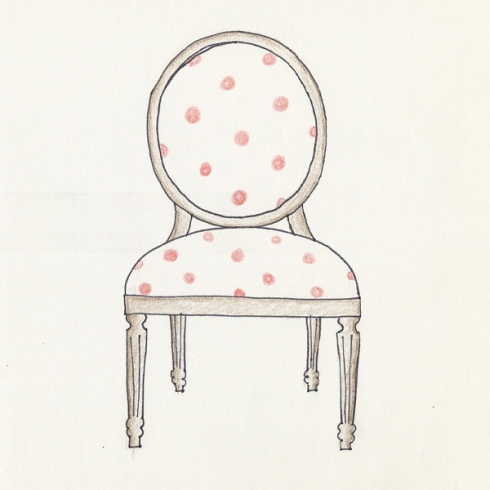
When this latest challenge rolled around, I knew that I couldn’t take on any big undertakings (since I have my own collection of big undertakings over at Clark the Flip House).  After looking at my collection of pins, I knew exactly which one I wanted to attempt.

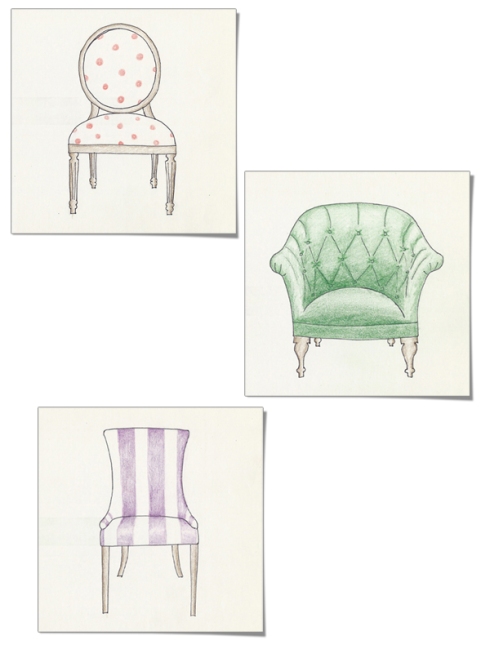
I love the informal feel of the sketch and the simple use of color.  So I had to try my hand at it.

polka dot chair

Naturally, though, I couldn’t stop there.  I decided the chair needed some friends.

chair sketches

The steps were very simple:

  • Use a pencil to sketch the desired chair- precision not necessary
  • When I was happy with the shape, I used a thin felt-tip pen to trace the outline.  Then erased the pencil guides.
  • Then I added color as desired.  Not too saturated, but a little pop of color/pattern in each.

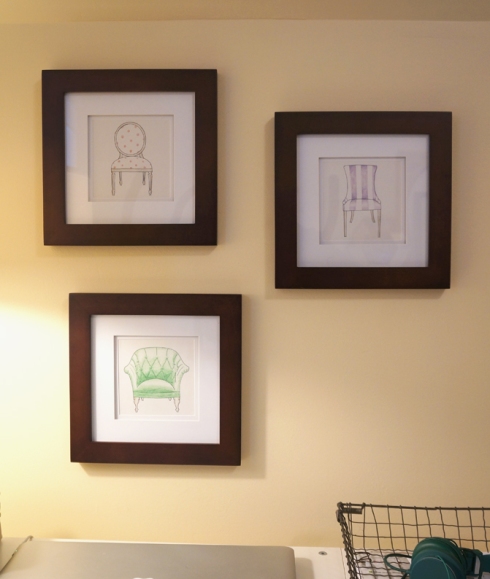
I’m REALLY pleased with the way they came out.  I popped them into some frames I picked up on sale at Michael’s and hung them on my office wall (with 3m picture strips so I can change my mind on location if necessary).

chair frames

This collection adds a nice balance to this wall since to the right is a wall-mounted tv.  I must apologize for the lighting in these pics- it’s a dreary, rainy day here in New England and I was forced to turn on the lamps- boo.

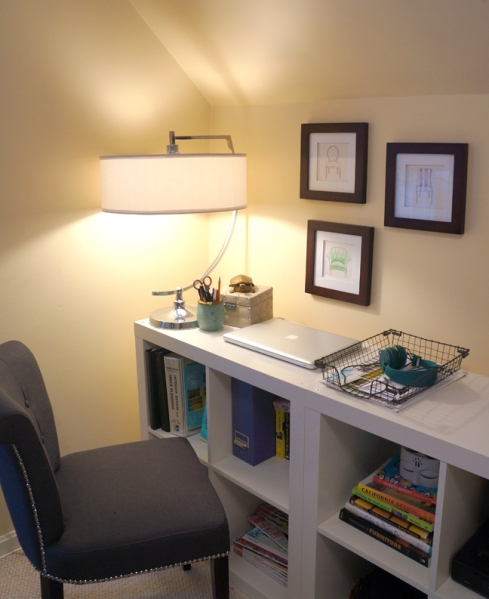
office chair collection

So, what do you think of my new artwork?

I’m not worried about my computer blocking the art, since this is only a temporary home for the computer until I get my butt in gear and finish my secretary desk eventually.

Now that I have my picture ledge on the wall and these on the wall, my office is starting to feel like a finished space.  Yay!  Not quite finished yet, but definitely well on it’s way!

Go check out the Pinterest Challenge Projects from this season’s hosts:

Sherry’s Board and Batten

Katie’s Growth Chart

Megan’s Fabric Ottoman

Michelle’s Button Art

I JuJu Do You?

31 Oct

After my first Fall Pinterest Challenge project did a bellyflop in the deep end, I scoured Pinterest for a new idea and the house to see what supplies I had available.  One project immediately jumped to mind.

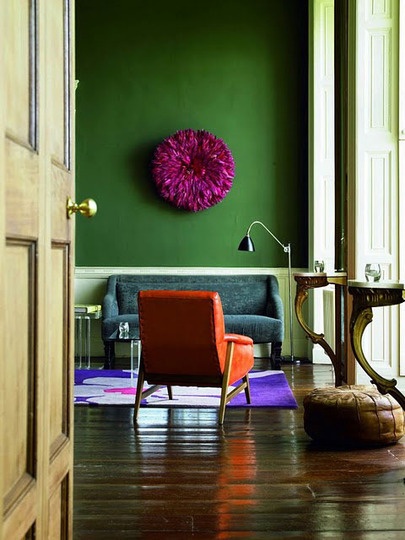
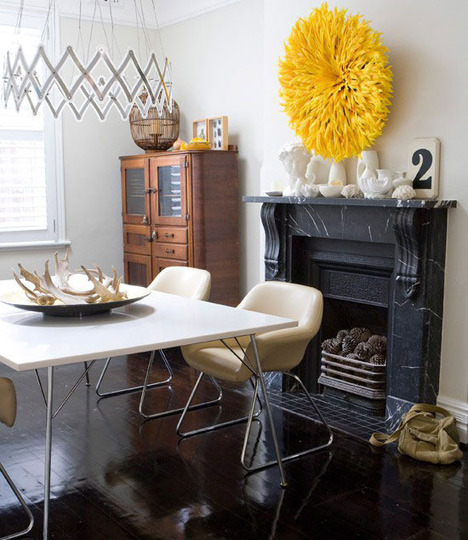
Yesterday I teased you with a couple of images of rooms with Juju hats.  I know I’m a little late to this bandwagon, but I think the feather hats add such texture to the room.  {images via apartment therapy}

juju apartment therapy

juju apt therapy

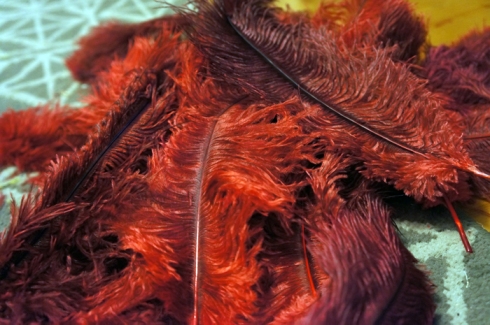
When I was making my wedding centerpieces 3 years ago, I had ordered a box of wine colored ostrich feathers off of ebay.  The feathers didn’t end up in the centerpieces and have been waiting for a purpose in life ever since.

ostrich feathers

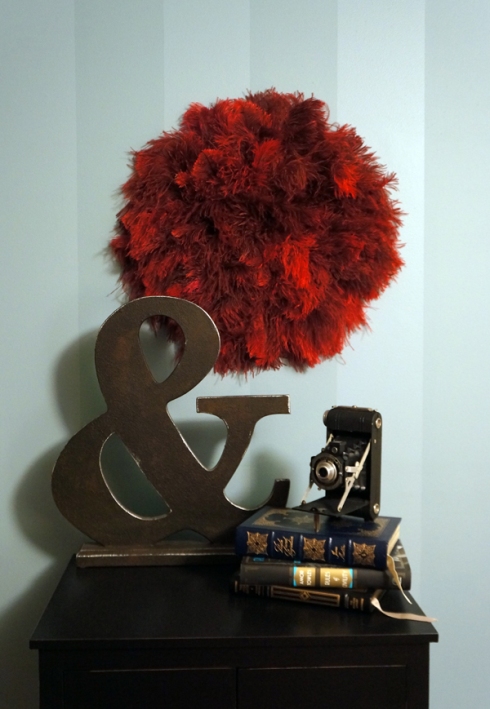
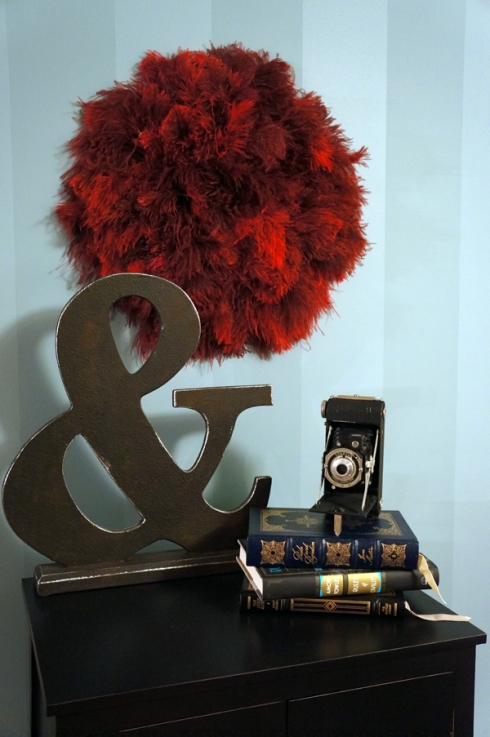
After 3 years of collecting dust, my feather friends have a new lease on life in the form of a DIY Juju hat.

juju hat after

In addition to the ostrich feathers, all I used was foam core and hot glue.  The project couldn’t have been much simpler.  (It could have been cleaner though- those feather pieces got absolutely EVERYWHERE)

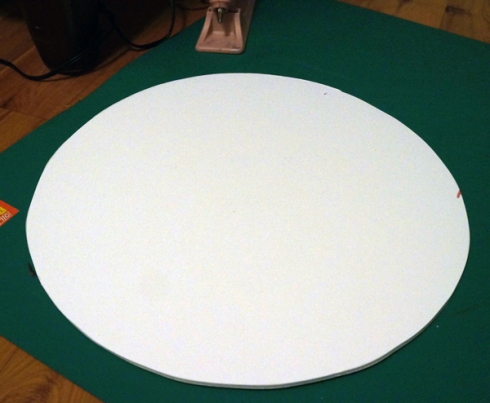
First, I cut a circle out of foam core using a lamp shade as a circle template.

juju foam core

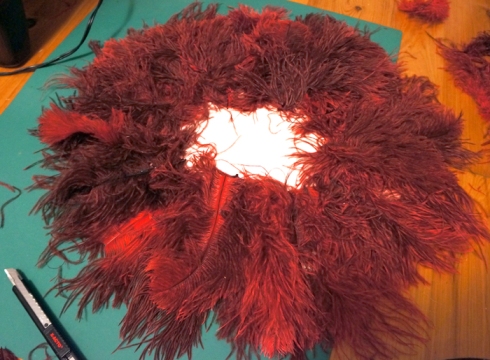
Then started layering on the feathers

juju progress

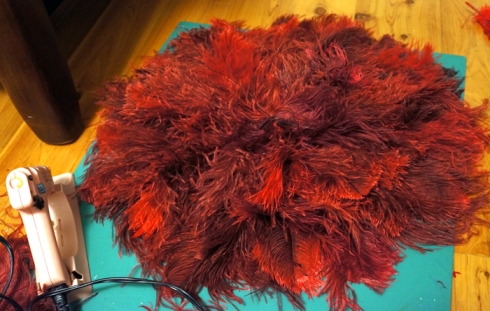
I worked my way outside in and just kept layering until I saw no more foam core.  I kept playing with the feathers and filling in areas until my fingers were covered in feather and hot glue and I was pleased with the shape of my Juju hat.

juju glue

Within about an hour, the pretty gal was ready to strut her stuff.

juju 2

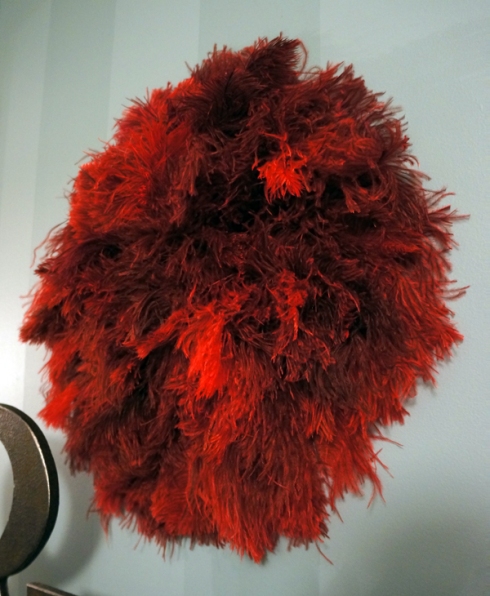
diy juju closeup

Not totally sure where it’s ultimate home will be- my soon to be office, perhaps?

juju angle

Check out some of the other Pinterest Challenge projects from the Challenge hostesses (and link up yours while you’re there):

Sherry @ Young House Love’s Chunky Chalkboard

Katie @ Bower Power Blog’s Succulent Terrarium

Carmel @ Our Fifth House’s DIY Dollhouse

Sarah @ The Ugly Duckling House’s Wood Ampersand

This project has been submitted for


Come vote for me!!

Falling for it Again

24 Oct

It’s officially Fall.  That doesn’t just mean a new season and falling leaves and pumpkins, though.  It also means it’s time for this season’s Pinterest Challenge!

This time Sherry @ Young House Love and Katie @ Bower Power Blog partnered up with Sarah @ The Ugly Duckling House and Carmel @ Our Fifth House to get us to stop “pinning” and start doing.  I can’t wait to see what all of them do!  You guys too!  I love checking out everyones projects when the challenges come along.

I’m struggling with what I should do for my own Pinterest Challenge Fall project, though.  My design brain is a little all over the place right now- working on and planning too many projects at once, so I haven’t yet decided which project to tackle.  My options include, but aren’t limited to:

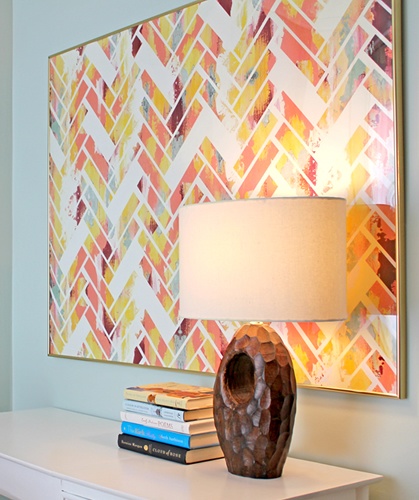
  • Art for my dining room (you might recognize this one- I showed it as a potential for the spring pinterest challenge as well- obviously I didn’t end up getting to it then)
diy chevron

via pinterest via cozmia

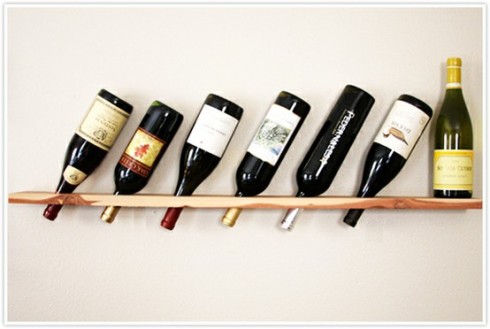
  • A wall-mounted wine rack- also for the dining room
wine rack shelf

via pinterest via Camille Styles

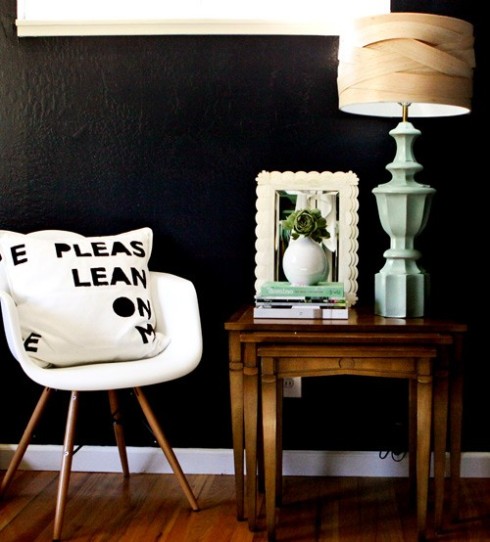
  • Custom lamp shades for the bedroom
wood shade

via pinterest via Design Sponge via Pomp and Circumstance

What are your votes?  At this moment, I’m leaning toward the lamp shades…. and the wine rack…. (see my problem??)

Succulent Terrarium

10 Jul

Thanks to the kick in the butt that is the Pinterest Challenge, I finally put together a succulent terrarium.

I had purchased the container months ago at HomeGoods and it was just waiting for the right thing to go inside.  I kept being drawn to the collections of succulents plastering Pinterest and I got sucked in.  I’m a sucker for succulents.

I purchased the succulents for $3 a piece at the hardware store.  My mom had river rocks (small and large) left over from past plants and willingly passed them on to me.  Since I already had the container, the actual plants were the only cost.

First, I used layer of both small and large rocks to cover the bottom for drainage.  One issue that I didn’t anticipate is the small opening of the container.  I could barely get the succulents in the opening, so maneuvering them into the right positions was a challenge.  Once I placed them where I thought would look nice, I covered the entire surface in more of the small pebbles and strategically placed a couple large stones on top.

What was an empty vessel a few days ago is now a warm addition to any room.

I just hope my black thumb for houseplants can manage to keep them alive!

_______________________

Did you do a project for the Pinterest Challenge: Summer Edition?  Post your links in the comments, I’d love to check them out!!

Here We Go Again!

5 Jul

Remember when all my blogger crushes got together and issued the past Pinterest Challenges? (Check out my projects for those here, here, and here)

Well, they’re at it again!

The amazing ladies issuing the challenge this time are:  Sherry @ Young House Love, Katie @ Bower Power Blog, Kate @ Centsational Girl, and Michelle @ Ten June.

For those of you unfamiliar with the Pinterest Challenge, it’s a way to get us pin-addicts to stop pinning and start doing.  We have a week to do a project inspired by something we pinned on Pinterest.  And since they issued the challenge on Tuesday, next Tuesday you’ll get to see the results.

This time, I’ve decided to jump on the succulent terrarium bandwagon.  Here’s my inspiration pin:

I already have a vessel in mind for my new terrarium.  In fact, I’ve been planning this for a while, but it keeps getting pushed down the to do list.  I guess that’s the point of the Challenge, right?  Stop talking about doing a project and DO the project.

If I get really ambitious, I might even try doing more than one challenge project.  I’m not going to hold my breath, but there’s a remote possibility.

Check back on Tuesday to see what I come up with!

Winter Edition

14 Mar

Ok, so, I’m not so proud of this latest pinterest challenge project, but I loves me a challenge, so I’ll suck it up and show it to you anyway.

Before I get to my latest project, I’ll show you my past Pinterest Challenge successes:

Pinterest Challenge: Summer Edition- Custom Plate Art

Pinterest Challenge: Fall Edition- Coffee Table Bench

and now onto Pinterest Challege: Winter Edition…..

Kitty Scratcher/Tower

I kinda phoned this one in, I’ll admit.  It’s less of a diy/design project and more of a pathetic attempt of a crazy cat owner to get the bear cat to stop scratching the stairs and upstairs carpets.  I picked this project of the three I was considering only because it was the quickest.  I did some hard-core lounging this weekend (and by hard-core lounging I mean bouts of tv catch-up intermixed with hours of scrubbing my severely neglected house) and didn’t get around to any challenge-related stuff.  It was a DIY free weekend- the first I can remember in recent history- and it was a very welcome change.   But that break left me with Monday night to shop and get something together by today to show you guys so I didn’t COMPLETELY embarrass myself.  Don’t worry, the other projects I was considering will definitely be done, and SOON- I have big plans for them.

The ‘Pin’ that I picked to tackle this time was originally from lowescreativeideas.com

I think it won me over partly because the cat in the picture looks a lot like Charlie

I decided to buy 2 different sizes of tubes to play around with it a bit.  This may or may not have been so successful (read: may not have been so successful).  BUT it did give me the opportunity to use a fun carpet sample that would have been too small for one of the larger tubes.  It was just dry enough to take clamps off this morning, so I don’t know yet if the kittens will actually use it, although they have been sniffing around it, so it’s looking hopeful.  They were, however not cooperative models.  Open windows and food dishes were MUCH more interesting.

Consider this post my apology for half-a**ing this season’s challenge, but it’s also a promise.  I VOW that the inevitable Spring Edition of the Pinterest Challenge will BLOW YOUR SOCKS OFF (or if its warm and you aren’t wearing socks, it’ll blow your shoes/sandals/flip-flops off) so be prepared.

If you haven’t already, hop on over to the lovely ladies who hosted this season’s Challenge and check out their awesome projects.

Katie @ Bower Power Blog’s Watercolor Jellyfish

Sherry @ Young House Love’s Pouf

Cassie @ Hi Sugarplum’s Faux Antlers

Erin @ The Great Indoors’ Mason Jar Candle Chandelier

Seriously AMAZING projects- great job guys!!!


It’s Happening Again

9 Mar

That’s right, Katie of Bower Power Blog and Sherry of Young House Love have issued the Winter Pinterest Challenge.  You probably know by now, that I am a sucker can’t resist a good challenge.  I’m powerless against Pinterest.  I’m defenseless against DIY.

If you missed the last two season’s pinterest challenges (seen here and here)- The Challenge is intended to get us pin-addicts to stop pinning cool DIY projects and DO the cool DIY projects.

I haven’t decided which project to tackle- I go a little pin-happy sometimes, so I have a LOT to choose from.  Whichever I choose, it’s not going be very large- gotta give myself a breather from those.

Here are the pins that I’m debating on tackling:

  • Kitty Scratcher/Tower
  • Custom Herringbone Painting

OR

  • Animal Coat Hooks (for the nephew’s room naturally)

I keep changing my mind every 5 minutes, so by the time I get to DOing this weekend, who knows what I’ll decide on.  Which one are you voting for?

How to be a Bench

3 Nov

Did you catch my big coffee table bench reveal yesterday?  Here’s how I got there:

I started with this

The first step was repair.  It needed love: popping veneer, broken off corners, and cracks everywhere.  I glued the veneer back down and the broken off pieces back into place, then went nuts with the wood filler.   Next step?

I finally had an excuse to buy a new power tool!! It’s nothing complicated or technical, but I am now the proud owner of a Ryobi Pad Sander.  You have no idea how excited that makes me (a wee bit pathetic maybe).  I got the sander so I could spare my arm- that thing needed a shit-ton of sanding.  Now my extensive power tool collection includes my drill, jig saw, and sander.  Keep em coming!!

Hubby could care less about tools, although that works for me because I could generally care less about cooking which he’s into.  He gets to enjoy the product of my power tool adventures and I get to enjoy the product of his attempts to be an iron chef.  Win-win!

Ok, back to the bench.  After sanding the crap out of the uneven top and smoothing all the wood filler, I went over the rest with deglosser.  First time trying a deglosser, but it seemed to work well.

It then got 2+ coats of Minwax Polyshades in American Chestnut and it dried to a fantastic slick glossy surface.  I used Polyshades on my dining table a few years ago and really liked how easy it was to get an amazing finish.   It acts more like a paint than a stain, which some might not like.  Not perfect for all projects, but perfect for this one!

While the base dried, I got started on the cushion.

My supplies were:

  • 3″ foam
  • Plywood
  • 1.5 yards of fabric
  • Batting (to put around the foam)
  • A staple gun (and staples of course)
  • Fabric button making kit
  • 1 super long needle
  • Strong thread

Before I went to get my supplies, I measured the size I wanted for the cushion.  Your friendly local home improvement warehouse store will cut a sheet of plywood to your needed size for free.  Since you buy the whole board anyway, I had them cut 2 to the right size in case I needed a do-over.  I got the foam at Joann Fabrics and I had to get creative.  You buy it by the yard, and 1 yard of 3″ foam was almost $50!  Luckily, it was 2′ wide and I only needed it 1′ wide.  I left with 22″ of foam which I then chopped in half with a super duper expensive (or not) bread knife from Christmas Tree Shops.  You want your foam to be larger than your plywood by about an inch on all sides.  Then comes the stapling fun!

I stapled the batting to the plywood, securing the foam.  After the batting was stapled, I trimmed the extra and brought out my fabric.

I was SUPER careful with this step since my fabric is a geometric.  Crooked fabric or wonky lines would be VERY obvious.  I started at the center of each side and pulled the fabric tight  as I went along.  When I got to the corners I tried my best at hospital corners, which was not an easy feat (and didn’t come out perfect).

I’m not gonna lie- the neat way this worked out on the back makes me kinda happy.

So for the buttons, it took me a bit to figure this out.  Making the buttons out of the fabric was easy (I followed the directions on the package), but trying to figure out how to attach them to the cushion was the tough part.  After a few failed attempts and a few Google searches, I figured it out.

With holes drilled in the bottom plywood, I hooked the button on the thread (several strands together), and threaded that onto the longest needle I could find.  Once I got the thread through the foam and the button in the right place, I pulled the thread tight and stapled the thread a few times.  Rinse, repeat.

It was agony waiting for the last coat of stain to dry on the base before I could assemble the 2 parts.  Once it was FINALLY dry, I centered the cushion on the top of the former coffee table and screwed through the bottom to attach the 2 parts.

Ta Da!!!

This totally makes me giddy and fits in the bedroom like it was MADE for that space (ya know, cuz it was).

I’m revved to do more in the bedroom now- the rest of the room needs to live up to my awesome new bench!